Introduction
In this section, i will show you how to get started with ASP.NET Identity. Both in a new project and in an existing project.
New project
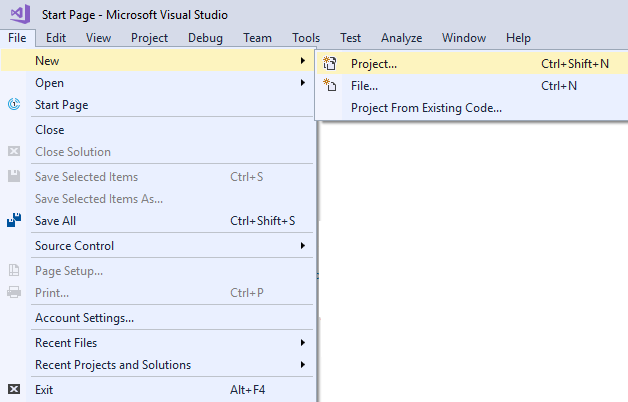
1- Go to File > New > Project in order to create a new ASP.NET MVC project.
2- Select ASP.NET Web Application and enter a name for the project.
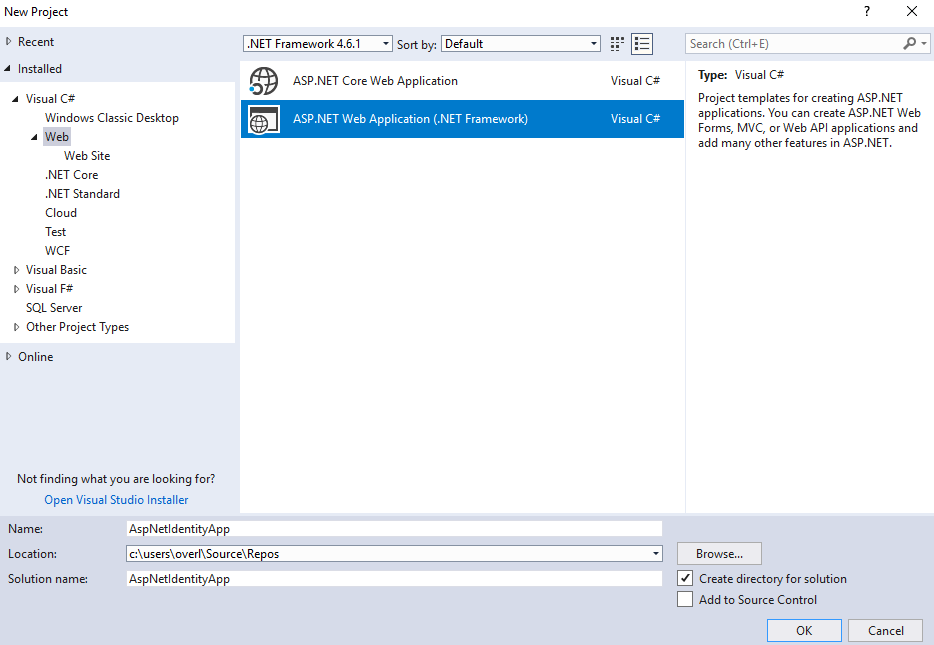
3- Check the MVC checkbox.

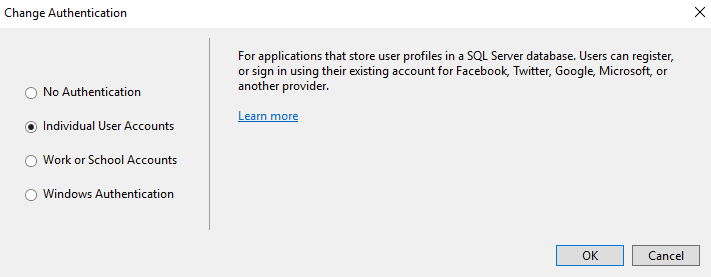
4- In order to implement ASP.NET Identity by default in this new project, click the Change Authentication
button and choose the Individual User Accounts option.
By following these steps, Visual Studio will automatically include all files needed to use ASP.NET Identity features in your project. Visual Studio will also provide a project template that will make it easier for you to get started with this membership system.
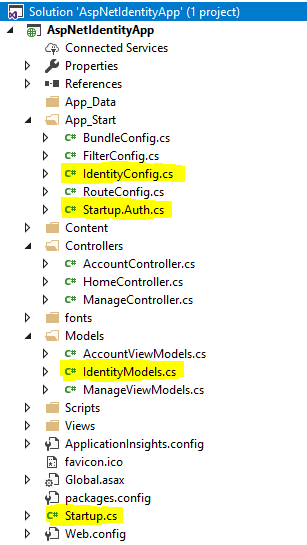
-
IdentityConfig.cs is primarily used to configure the
user managerand thesign-in managerof the application. - Startup.Auth.cs is used to configure authentication.
- IdentityModels.cs is used to customize user profile.
-
Startup.cs contains the
Startupclass which is the entry point of the application.
Existing project
ASP.NET Identity is available as a NuGet package, so we will use NuGet Package Manager
in order to implement it in an existing project.
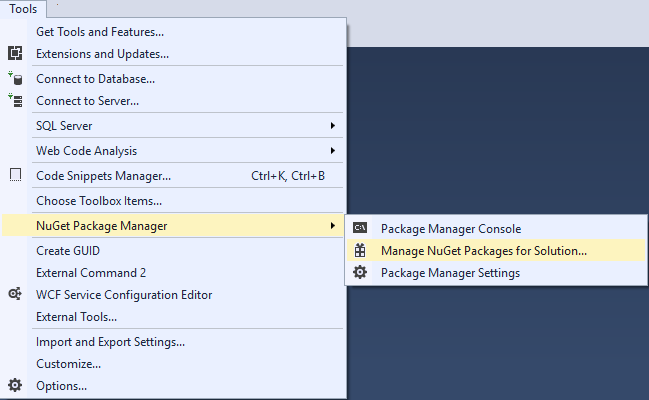
1- Go to Tools > NuGet Package Manager and select the Manage NuGet Packages for Solution option.
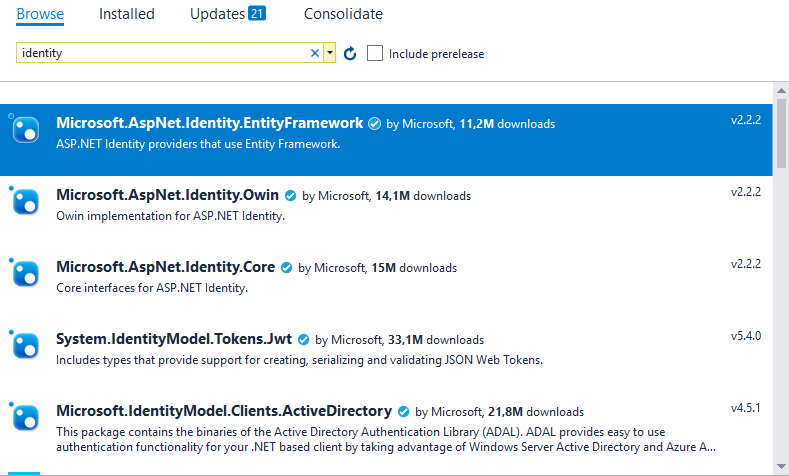
2- In the Browse tab, search for the Microsoft.AspNet.Identity.EntityFramework package.
3- Check your project and click the Install button.

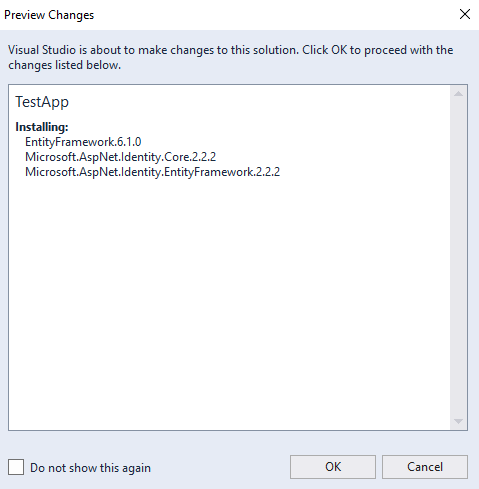
The Microsoft.AspNet.Identity.EntityFramework package will also install the dependency packages :
Microsoft.AspNet.Identity.Core and EntityFramework.
4- Click the OK button.
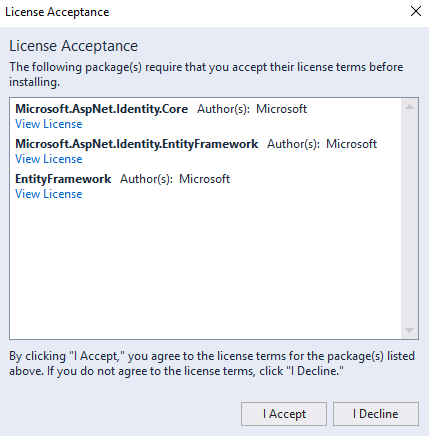
5- Accept the licence terms by clicking the I Accept button.
6- Search for and install the Microsoft.AspNet.Identity.Owin package and the Microsoft.Owin.Host.SystemWeb package by following the same above steps.
7- Download the following files :
- IdentityConfig.cs (App_Start folder)
- Startup.Auth.cs (App_Start folder)
- IdentityModels.cs (Models folder)
- Startup.cs (root folder)
8- Copy and paste the above files in their respective folders.
Note : Make sure to change the AspNetIdentityApp namespace in the files with your own project namespace.