Introduction
In the previous section, we implemented ASP.NET Identity in our project. In this section, we will setup ASP.NET Identity database using EF Code-First approach.
Create a new ASP.NET Identity database
In the Models\IdentityModels.cs file, we have the following database context class :
public class ApplicationDbContext : IdentityDbContext<ApplicationUser>
{
    public ApplicationDbContext(): base("DefaultConnection", throwIfV1Schema: false)
    {
    }

    public static ApplicationDbContext Create()
    {
        return new ApplicationDbContext();
    }
}
The ApplicationDbContext class is derived from the IdentityDbContext class which is responsible for interacting with the database. The base constructor of this class takes the name of the connection string to use.
The connection string contains the data source, the database name and other parameters needed in order to establish
the connection. You can define the connection string in the Web.config of the application :
<connectionStrings>
<add name="DefaultConnection" connectionString="Data Source=.\SQLEXPRESS;Initial Catalog=AspNetIdentity;Integrated Security=True" providerName="System.Data.SqlClient" />
</connectionStrings>
In the above connection string, we are using SQL Server Express as the data source and AspNetIdentity as the database
name. We link the connection string with the context class by using the name parameter.
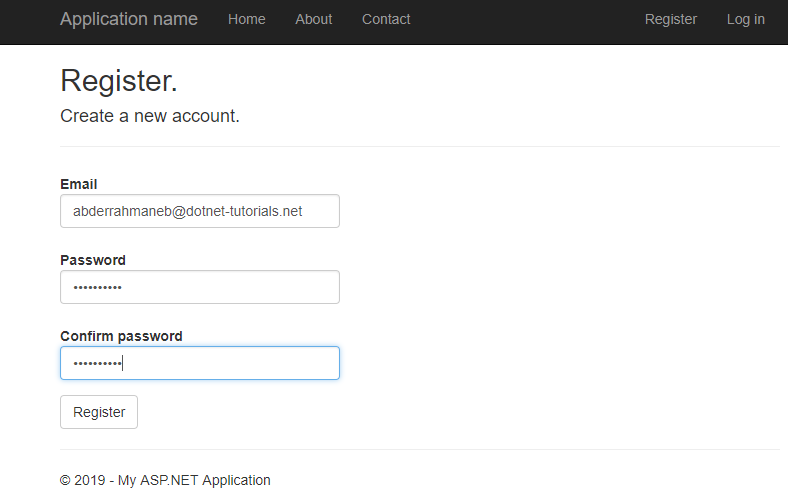
To trigger the creation of the database : run the application, click the Register link, fill out the form to create a new account and click the Register button.
If you do not have the ASP.NET Identity project template, you can still trigger the creation of database by using the ApplicationDbContext class as shown below.
public class HomeController : Controller
{
    private ApplicationDbContext ctx;
    public ActionResult Index()
    {
        ctx = new ApplicationDbContext();
        List<ApplicationUser> users = ctx.Users.ToList();
        return View();
    }
}
Don't forget to include the Models namespace :
using AspNetIdentityApp.Models; /*replace AspNetIdentityApp with your project name*/
By performing a request, either via the Register button or the Home/Index method,
Entity Framework will create the AspNetIdentity database with all the appropriate tables.
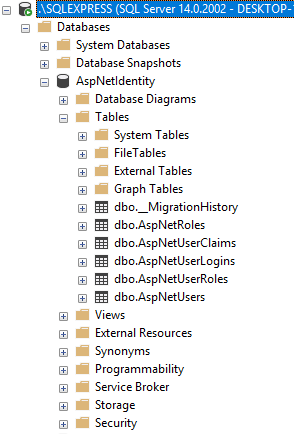
Visit the ASP.NET Identity's architecture for more information about the above tables.
Setting up ASP.NET Identity in an existing database
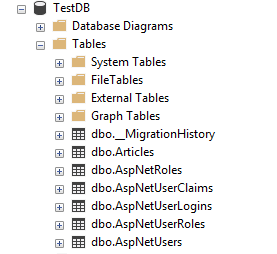
Let's assume you have already an existing database in your project called TestDB containing a table
called Article with the following context class :
public class Context : DbContext
{
    public Context() : base("TestConnection") {

    }

    public DbSet<Article> articles { get; set; }
}
The connection string :
<connectionStrings>
<add name="TestConnection" connectionString="Data Source=.\SQLEXPRESS;Initial Catalog=TestDB;Integrated Security=True" providerName="System.Data.SqlClient" />
</connectionStrings>
And the Article entity :
public class Article
{
    public int ArticleId { get; set; }

    public string Title { get; set; }

    public string Description { get; set; }
}
In order to setup ASP.NET Identity in this existing database, follow the steps below :
1- In your context class, extend the IdentityDbContext class and add the following method :
public static Context Create()
{
    return new Context();
}
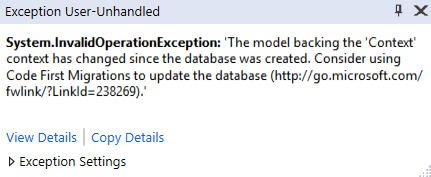
Since we are going to change the database schema, you have to enable the code-first migrations. Otherwise, you will get the following error message :
2- In order to enable the code-first migrations : go to Tools > NuGet Package Manager > Package Manager Console
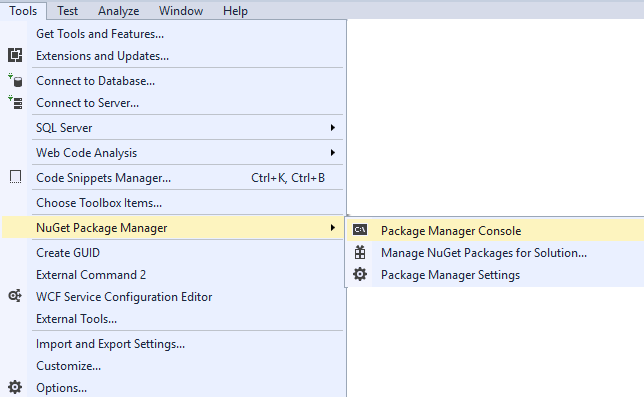
And run the enable-migrations -EnableAutomaticMigrations command.
This will result in the creation of a Migrations folder containing a Configuration class.
3- Set the database initializer to MigrateDatabaseToLatestVersion as shown below.
public class Context : IdentityDbContext<ApplicationUser>
{
    public Context() : base("TestConnection") {
        Database.SetInitializer(new MigrateDatabaseToLatestVersion<Context, Configuration>());
    }

    public DbSet<Article> articles { get; set; }

    public static Context Create()
    {
        return new Context();
    }
}
In order to use the the IdentityDbContext and the Configuration classes in your context class, you have to include the following namespaces :
using Microsoft.AspNet.Identity.EntityFramework;
using AspNetIdentityApp.Migrations; // replace AspNetIdentityApp with your project name
4- Remove the ApplicationDbContext class from the Models\IdentityModels.cs file.
5- In the Models\IdentityConfig.cs file, replace the ApplicationDbContext class with your own context class.

6- In the Models\Startup.Auth.cs file, replace the ApplicationDbContext class with your own context class.

7- Run the application and check the database. You will find the Articles table plus all the appropriate
ASP.NET Identity tables.